Email Outreach Setup
Building Your Email
- To setup a marketing email navigate to the Outreach tab through the drop-down menu in the top corner of your screen.
- An initial outreach template will pre-populate, you can work from this
framework or delete the existing items and start from scratch.
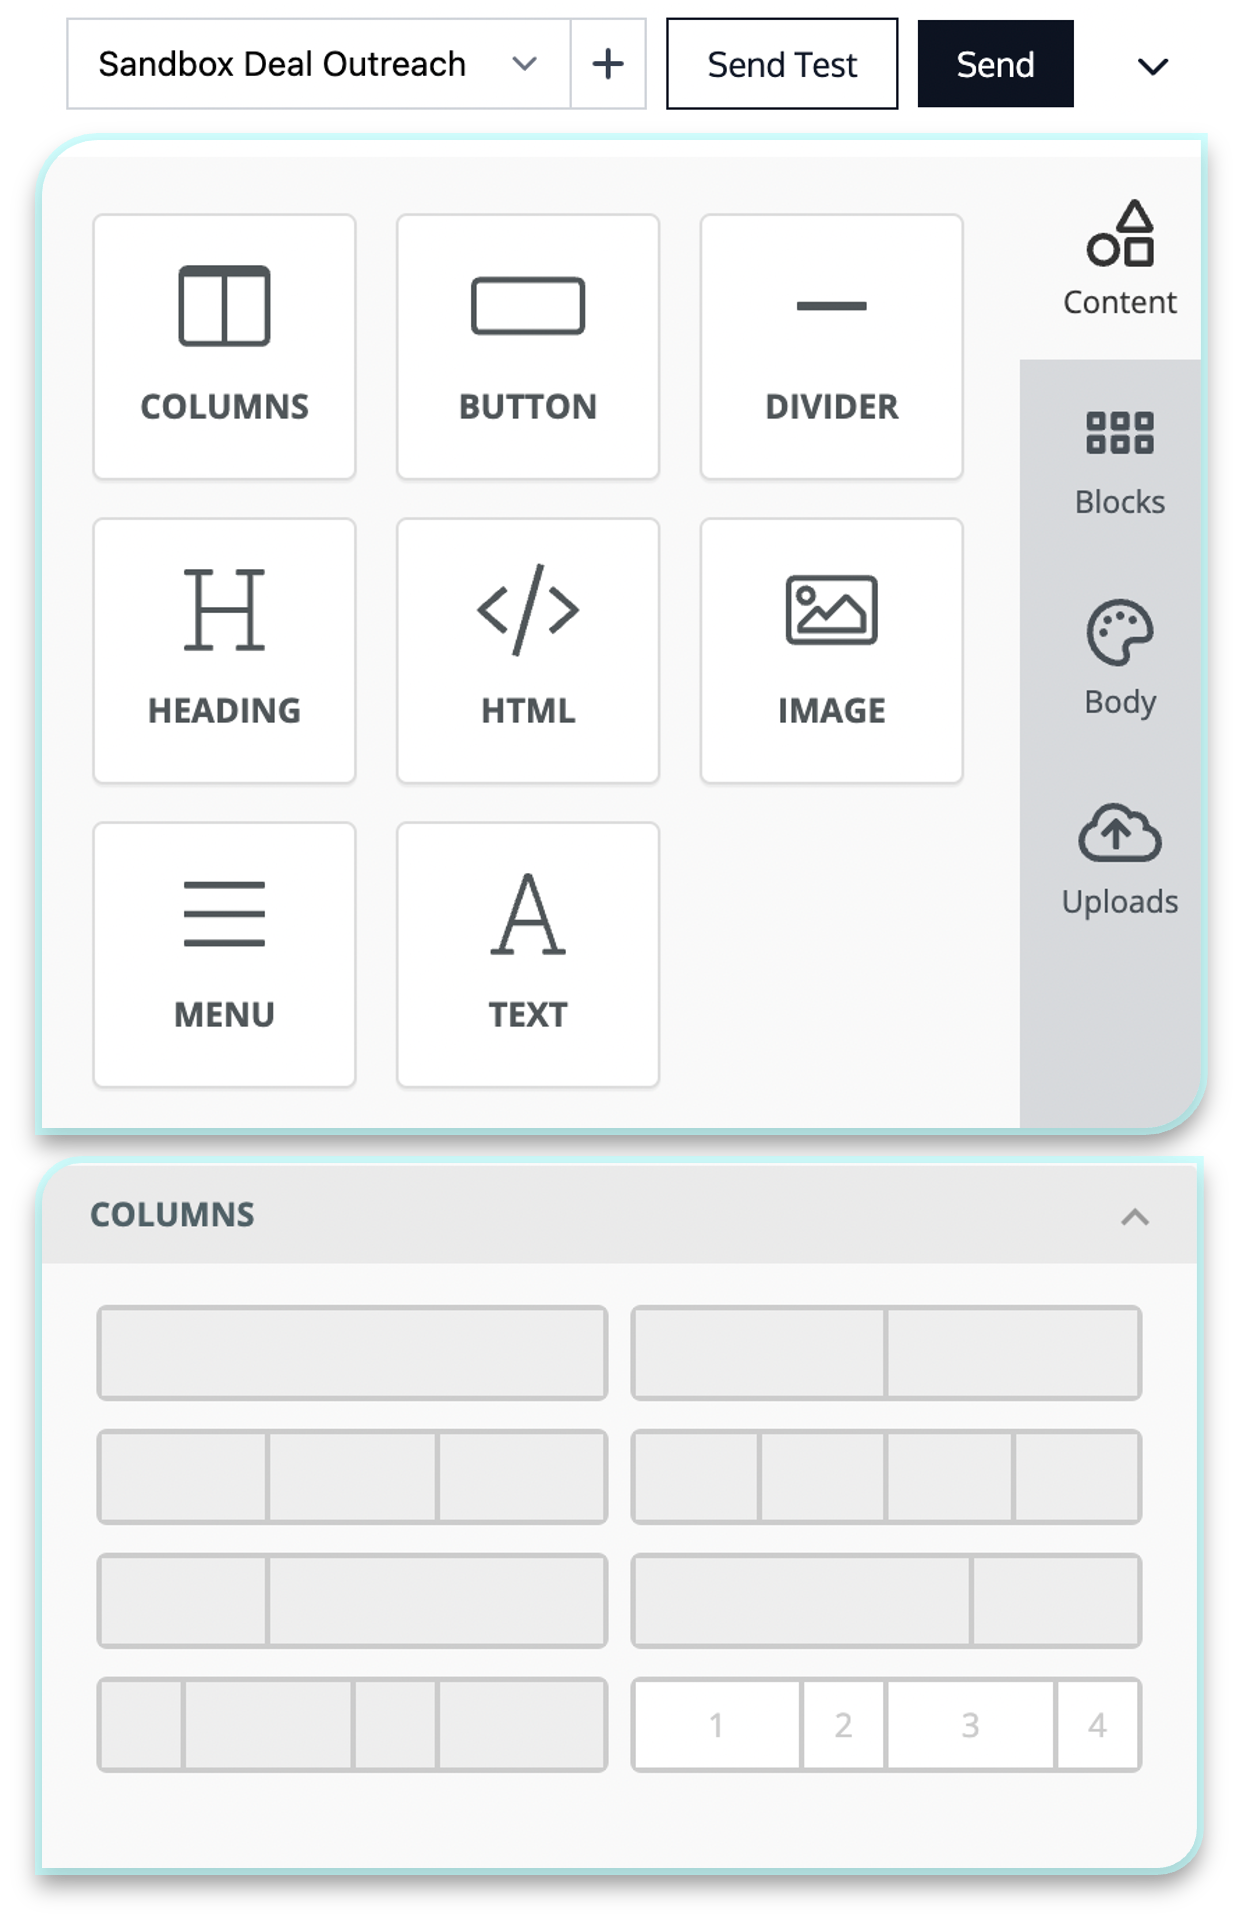
- If you would like to clone outreach from a previous deal you worked on to use as a template, select the + next to “Send Test” in the top right corner.
- The drag and drop editor system allows you to Drag in types of content.
- Always begin by dragging in columns.
- Click on a column to select how many content blocks are within that column.
- Drag and drop the type of content that you would like displayed into those
blocks.
- You can adjust this contents appearance / actions by clicking on the item and adjusting the sliders on the right panel
Adding Content
When adding a button:
- Make sure to set the action type to your preferred action.
- Any buttons linking to a Virtual Data Room will automatically direct to a CA signature page prior to granting access.
When adding an image:
- Please be aware scaling up small images may result in a loss of image quality
- We suggest setting an “Action” from the side panel directing to the Deal Page (Please note the ”Action” setting NOT the image URL).
When adding text:
- If we do not have your desired font, please email one of the contacts on “Technical Support / Customer Success” and we will shortly add the font to our library.
- If you wish to insert a link or the ability to email, highlight the specified text and click the insert/edit link button.
- Use the dropdown menu to adjust the action of this link.

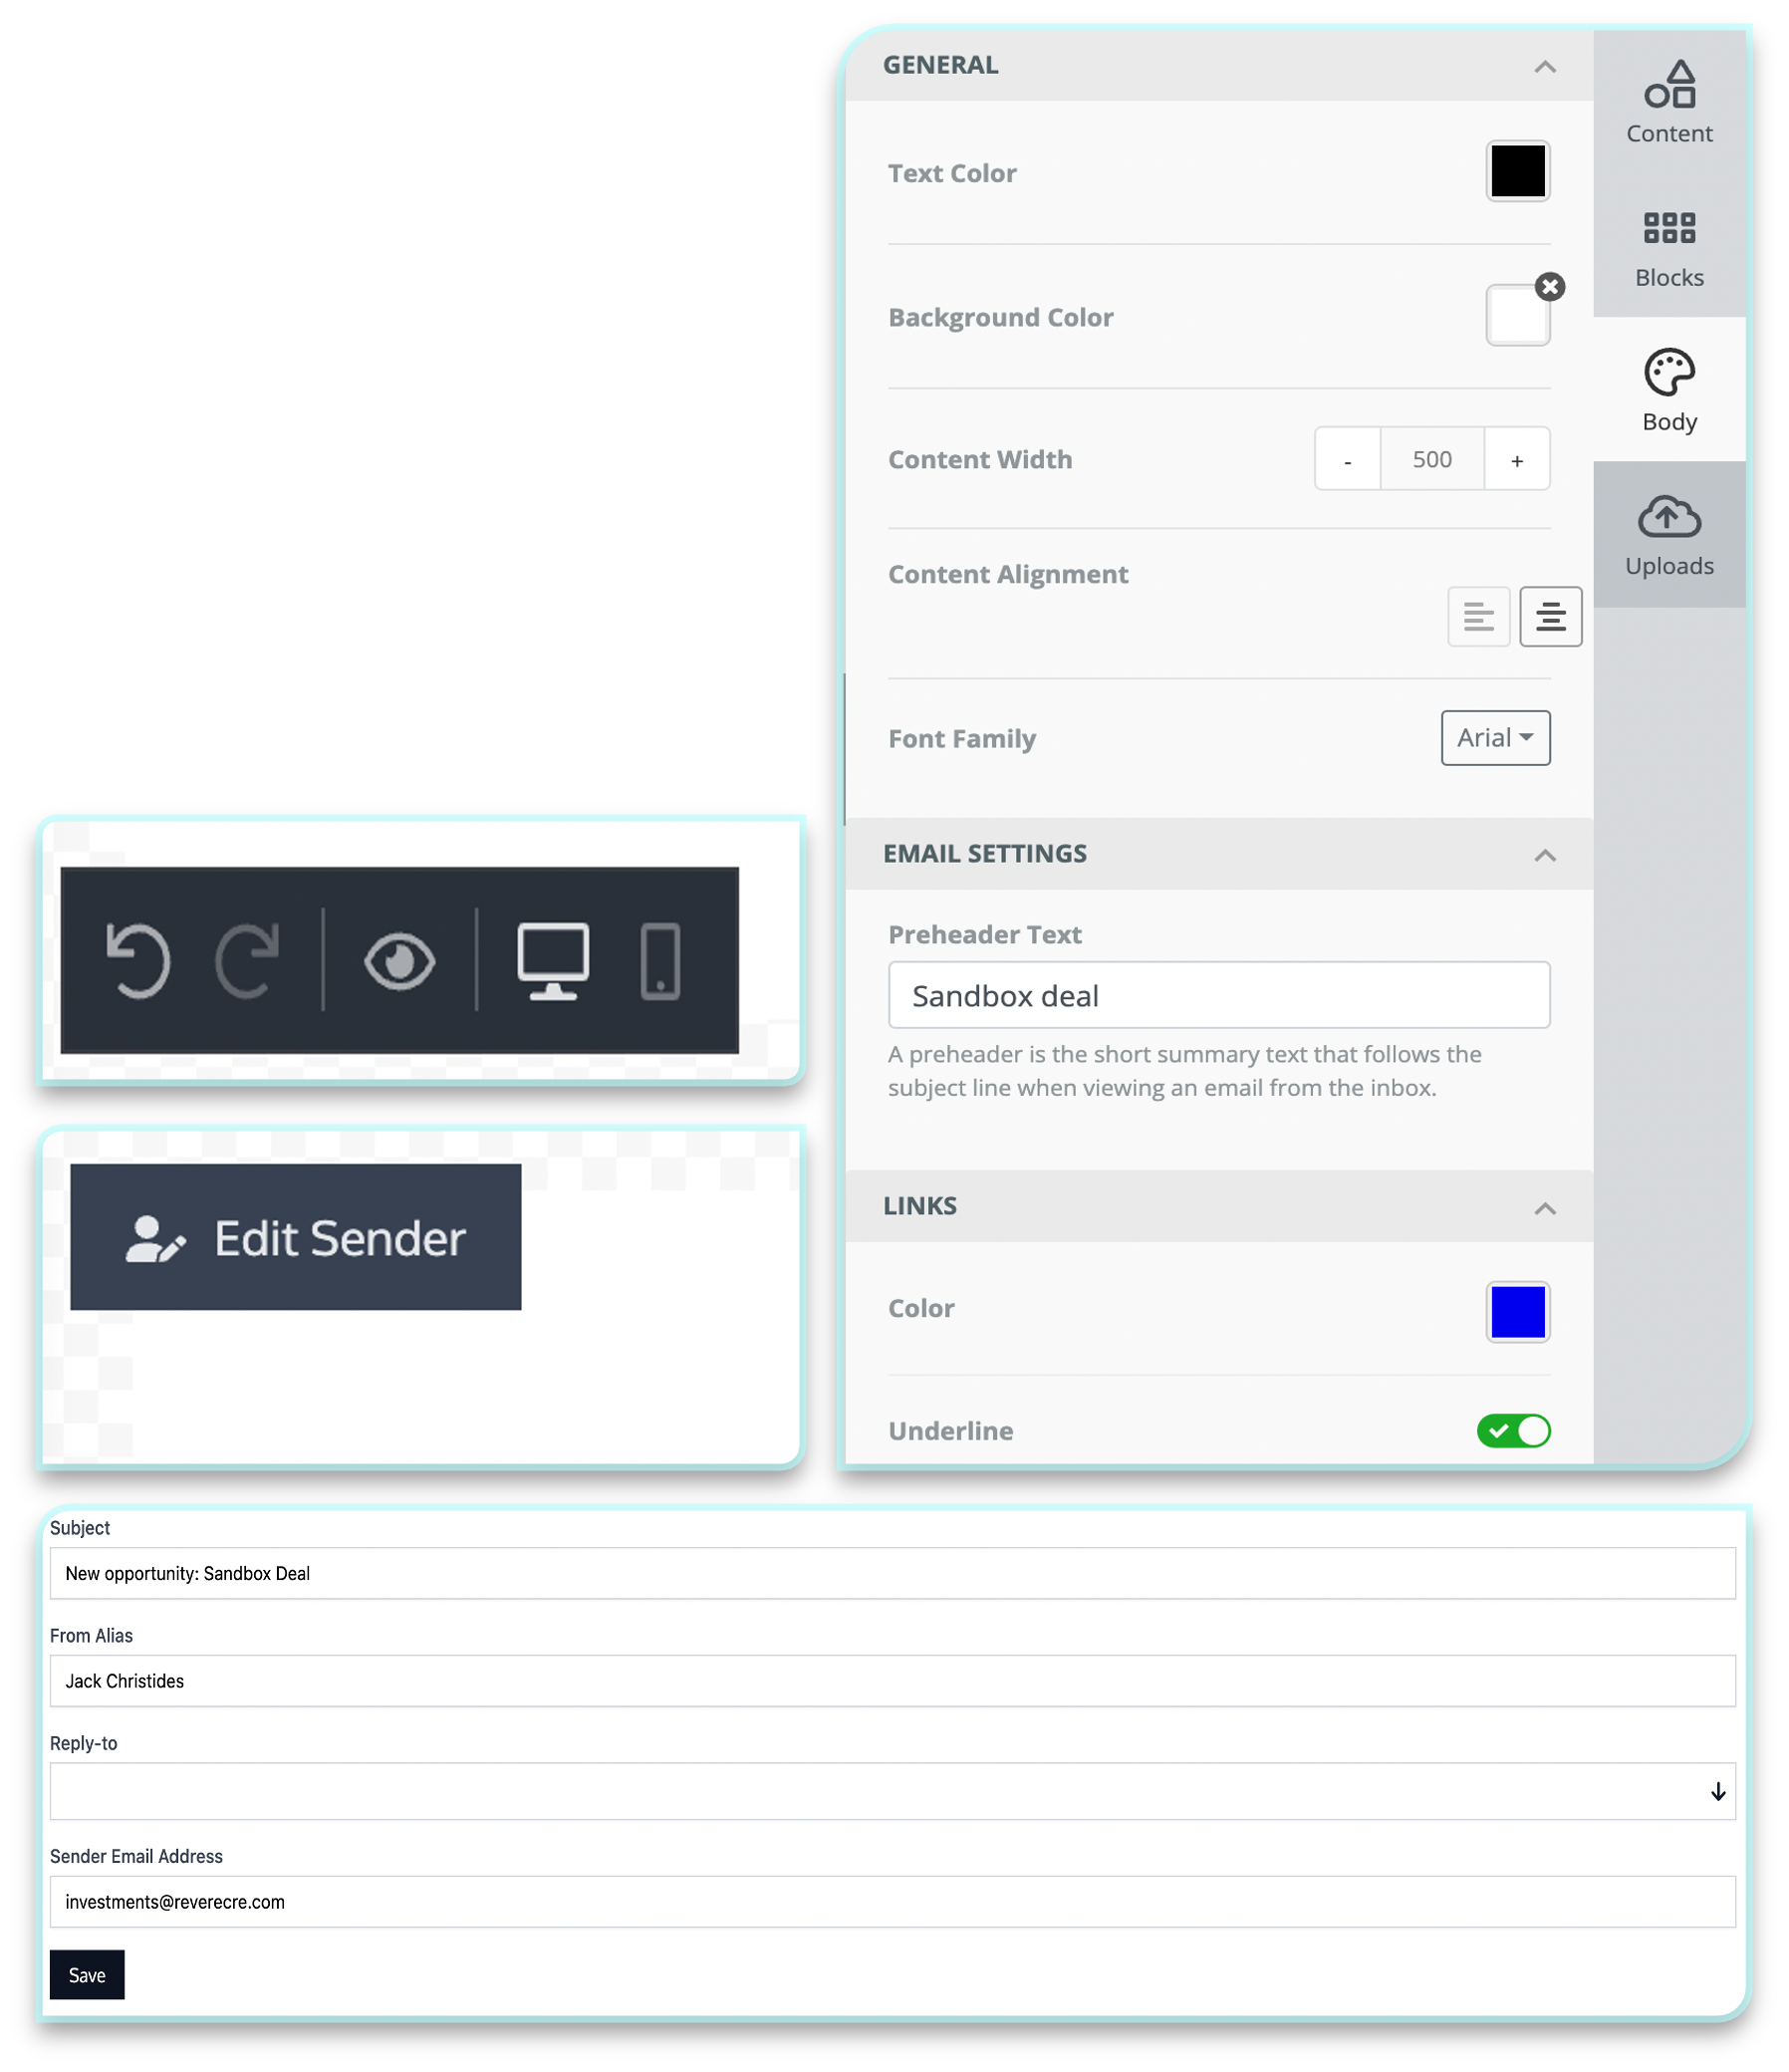
Configuring the Envelope
- Adjust the “Body” section to change your overall email preferences.
- We do not suggest going past 600px wide as many email clients begin to have trouble with larger content
- We suggest the Pre-Header text compliment a short subject line with one to two sentences describing the opportunity
- Select “Edit Sender” in the top right corner of the email designer to adjust
sender preferences
- You can have multiple Reply-to, but these emails MUST be associated with a Revere account to receive responses
- Sender email address can be edited but must match format 'investments-YOUR [email protected]
- Please make sure to click save following all edits
- To preview your email, select the eye image in the bottom left cored of the
email editor
- You can preview your outreach as it will appear on a variety of desktop and mobile views
- In order to edit the view on mobile select the phone image in the bottom left corner of the email editor
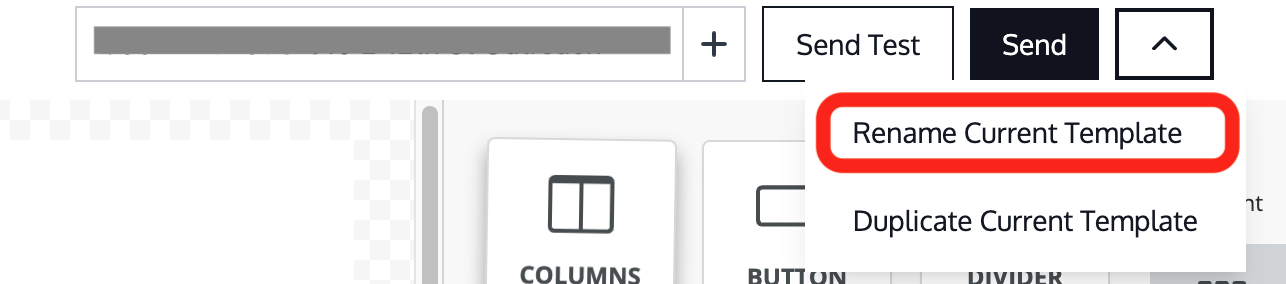
Renaming a Template
To rename an outreach template:
- Click the top-right dropdown next to Send.
- Click Rename Current Template.
- Enter the new name in the form and click Update.