To create a Virtual Data Room, navigate to the Data Room tab through the
drop-down menu in the top corner of your screen.
Drag and drop files to add them to the VDR.
Files will appear in the VDR in alphabetical.
If you would like to add one large file with your documents, save the file
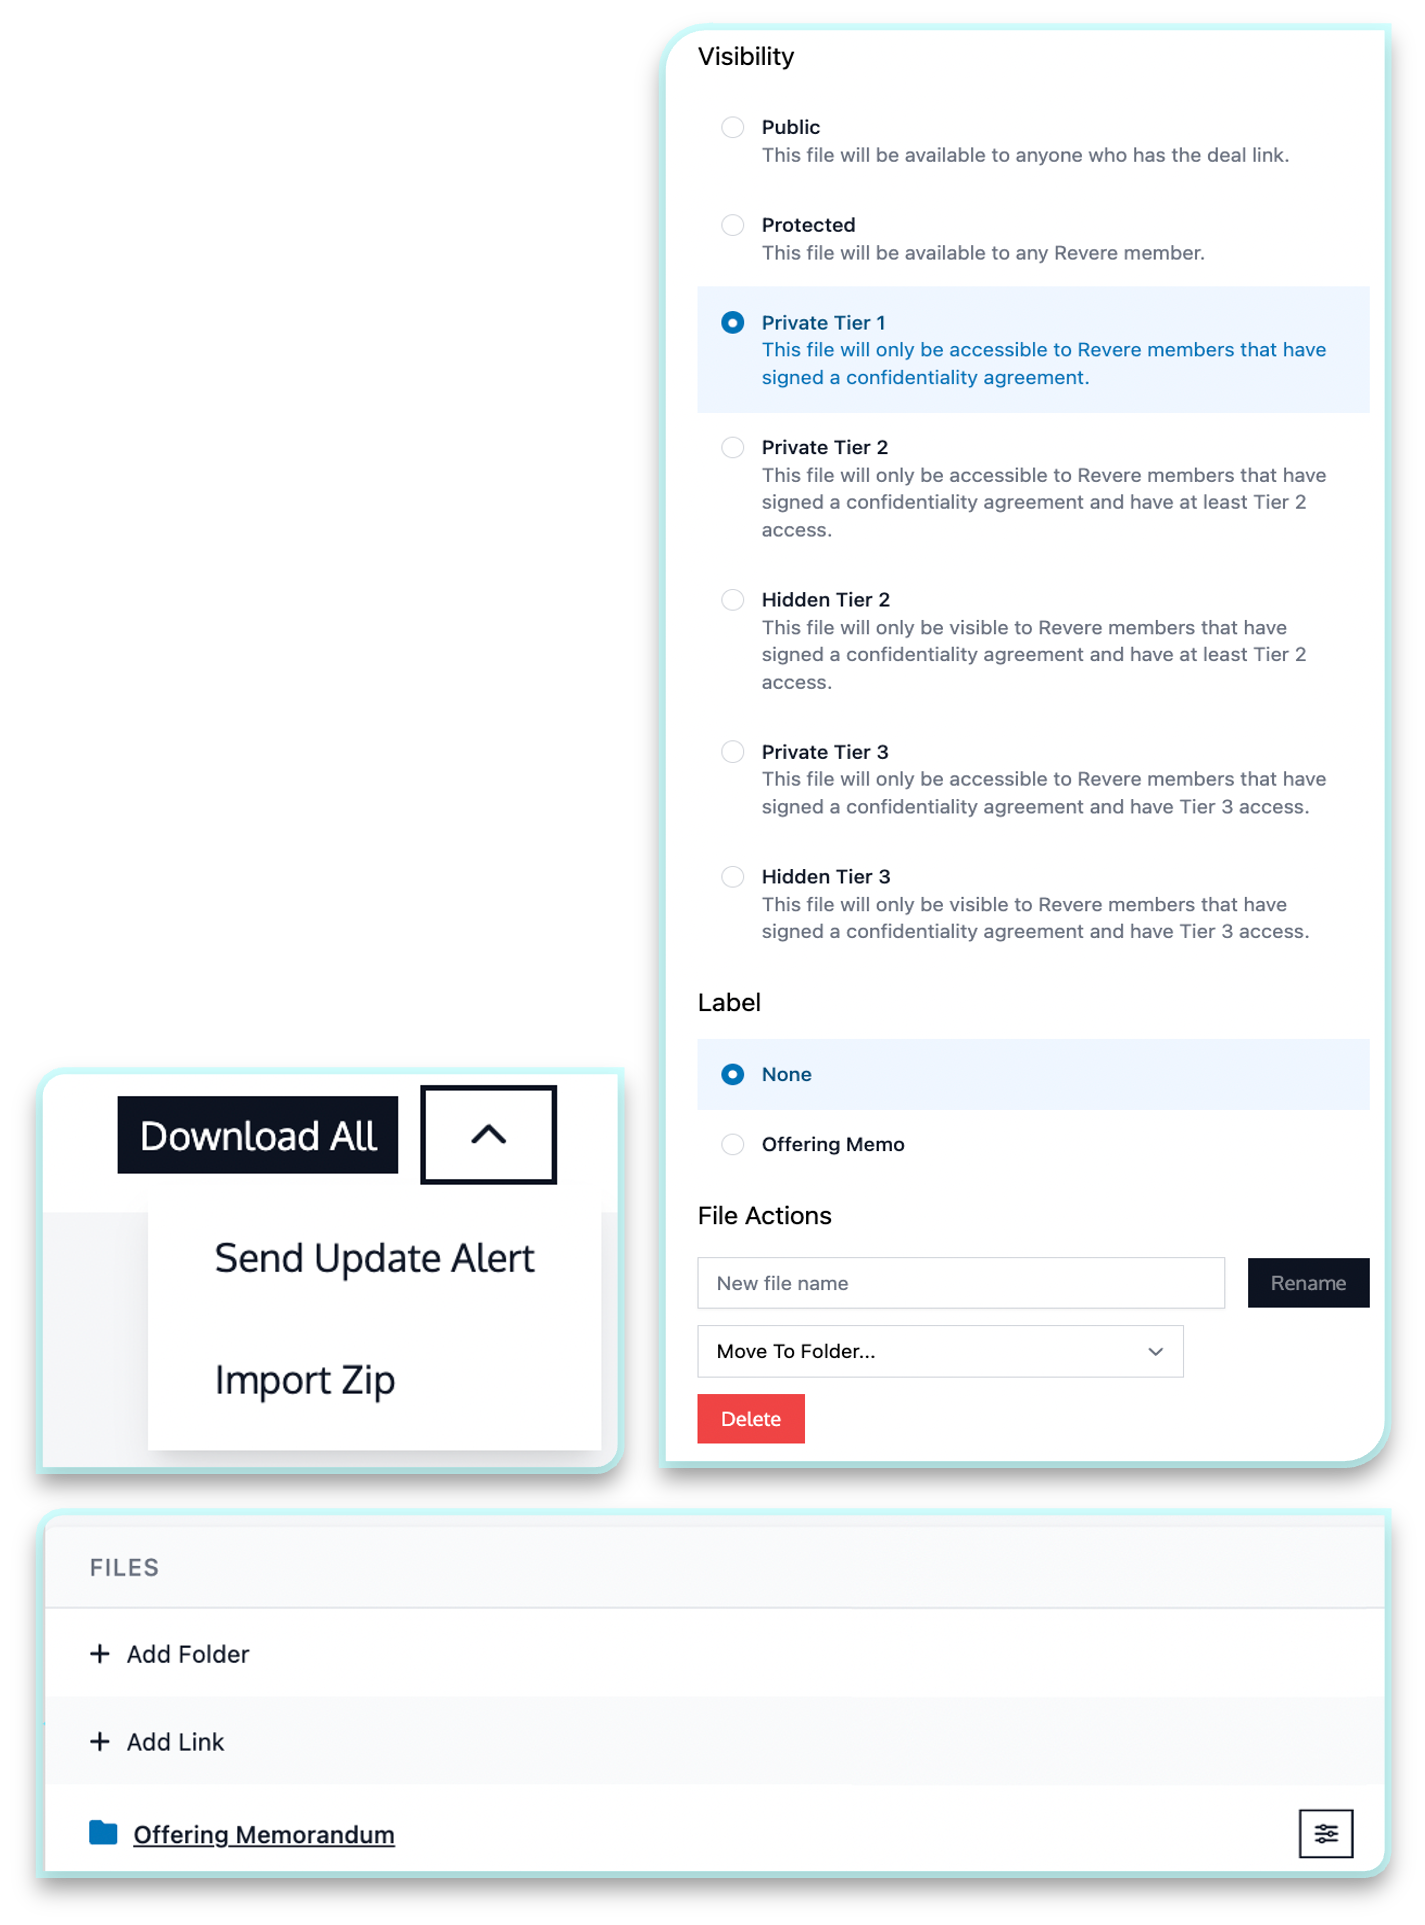
as a Zip File and select import zip from the drop-down menu in the top right
corner.
Once you have uploaded your files to the data room you can begin to structure
files / folders.
Move files to new or existing folders by clicking the sliders to the right
of the file name and adjusting File Actions.
Assign files / folders tiered status of bank level security by clicking on
the sliders to the right of the document / file name.
Designate a CA by clicking on the sliders to the right of the file name
Please note a CA should ALWAYS be designated as public, this will prompt
investors to view and sign the CA prior to viewing other documents in the
Virtual Data Room.
You can also designate a broker-specific CA using the same sliders to the
right of the file name. In this case, brokers would need to sign the
"Broker CA", and investors would sign the main CA.
Designate an OM by clicking on the sliders to the right of the file name.
Deal Room Update Alerts can be sent by clicking the down arrow then Send
Update Alert.